
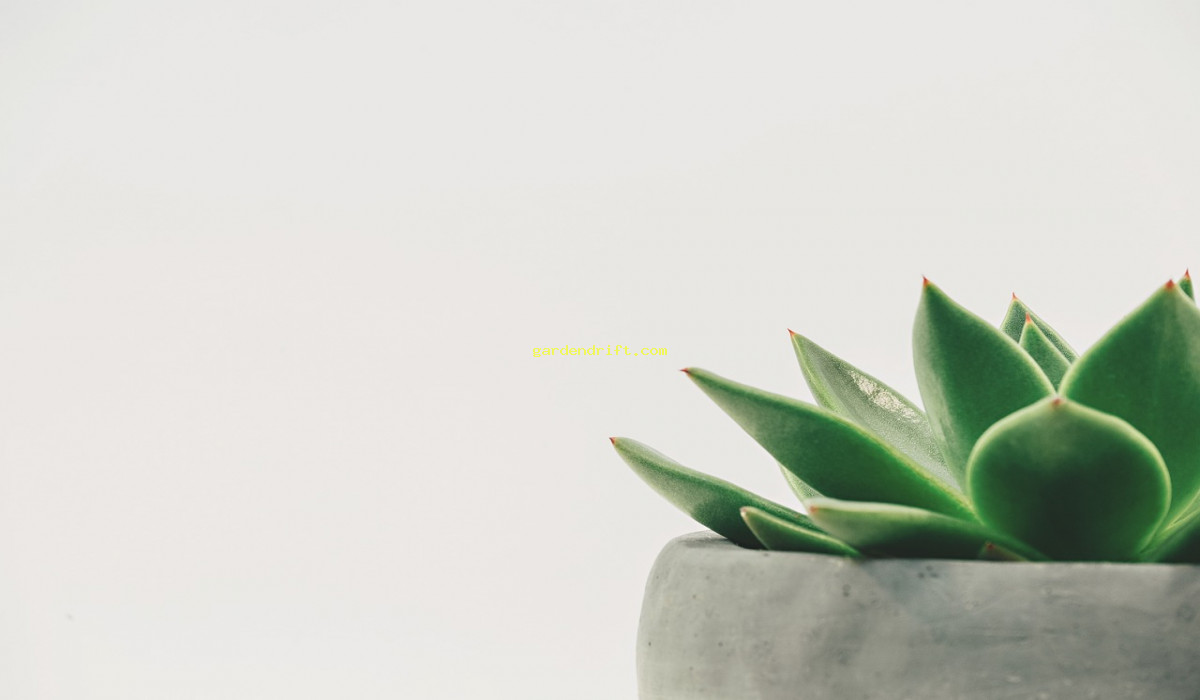
Simple Steps to Plant Seed Starts: A Beginner’s Guide. Ready to start your own garden? Learn how to properly plant seed starts with these easy tips! Say goodbye to complicated gardening jargon, and hello to a beautiful and thriving garden. Follow our simple guidelines to get your seed starts in the ground and watch them grow into lush plants. Your green thumb awaits!
Simple Steps to Plant Seed Starts: A Beginner’s Guide. to a beautiful Simple Steps to Plant Seed Starts: A Beginner’s Guide
Simple Steps to Plant Seed Starts
How to Plant Seed Starts: A Beginner’s Guide
Planting seed starts is an exciting and rewarding experience. Not only do you get to see your garden grow from the very beginning, Simple Steps to Plant Seed Starts but you also have the opportunity to nurture and care for your plants as they develop. Whether you’re new to gardening or just looking for some tips and tricks, Simple Steps to Plant Seed Starts this article will provide you with all the information you need to successfully plant seed starts.
What Are Seed Starts?
Seed starts are plants that have been started from seeds indoors before being transplanted into your outdoor garden. This method of gardening is great for getting a head start on your growing season, as well as controlling the environment in which your plants grow.
Here are some reasons why people choose to use seed starts:
- Extend growing season: Starting plants indoors allows you to get a head start on your growing season and have larger, more mature plants when it’s time to transplant them outside.
- Better control of environment: By starting your plants indoors, you have more control over factors like temperature and moisture levels, providing optimal growing conditions for your plants.
- Cheaper: Starting plants from seeds is generally cheaper than buying already established plants.
- More variety: Starting from seeds gives you a wider variety of plant options compared to buying seedlings.
How to Plan Your Garden Space for Seed Starts
Before you start planting your seeds, it’s important to plan out your garden space to ensure that your plants have enough room to grow and thrive. Here are some tips for planning your garden space for seed starts:
- Choose a location that receives ample sunlight: Most plants require at least 6 hours of sunlight a day. Make sure to choose a spot in your garden that gets enough sun exposure.
- Consider the size of your plants: Make sure to space your plants according to their mature size. This information can usually be found on the seed packet.
- Plan for water accessibility: Make sure your garden space is close to a water source for easy watering.
- Consider the layout of your garden: Think about how you want to arrange your plants in your garden and plan for pathways and overall aesthetics. This will make it easier for you to maintain and harvest your plants in the future.
Materials You’ll Need for Planting Seed Starts
To ensure a successful planting experience, make sure you have all the necessary materials ready before you start. Here’s what you’ll need:
- Seeds: Choose the type of seeds you want to grow based on your preferences, climate, and growing season.
- Pots, trays, or containers: You can use seed starting trays, small pots, or even egg cartons to start your seeds. Just make sure they have drainage holes for proper water drainage.
- Seed starting mix: This is a light and airy potting medium that is specifically designed for starting seeds. It provides the perfect conditions for germination and root development.
- Labels: Make sure to label your seeds so you know which plants are which.
- Watering can: A small watering can with a fine spout is ideal for watering your seed starts without disturbing the seeds.
- Spray bottle: A spray bottle can be used to keep the soil moist without overwatering.
- Grow lights: If you don’t have enough natural sunlight, you may need to invest in grow lights to provide your plants with sufficient light.
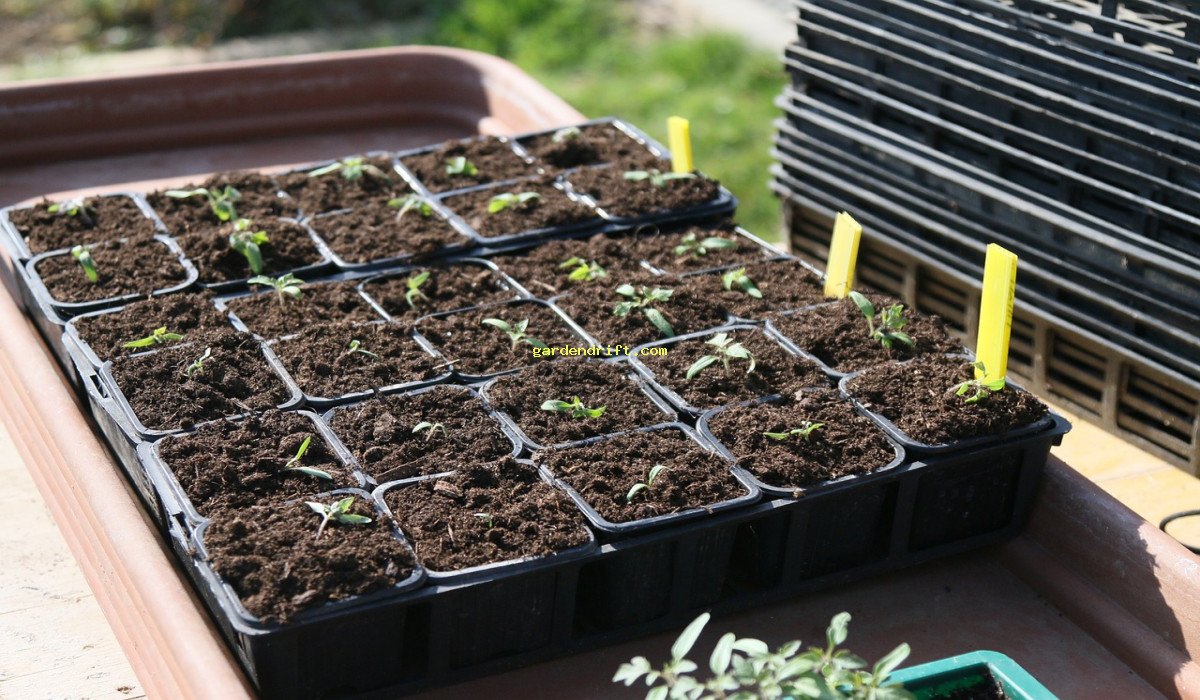
Steps for Planting Seed Starts
Once you have all your materials ready, it’s time to start planting your seed starts. Simple Steps to Plant Seed Starts Follow these steps for a successful planting experience:
- Fill your pots or trays with seed starting mix: Fill your containers about ¾ full, leaving enough room for the seeds and water.
- Moisten the mix: Lightly water the mix before planting your seeds. It should be damp, but not sopping wet.
- Plant your seeds: Follow the instructions on the seed packet for the proper planting depth. Typically, seeds need to be planted 2-3 times their height deep in the soil. Gently press the soil over the seeds to ensure they have good contact with the soil.
- Label your seeds: Use your labels to identify which seeds are which. This is especially important if you’re planting multiple types of seeds in the same container.
- Keep the soil moist: Use your spray bottle or watering can to keep the soil moist, but be careful not to overwater.
- Provide adequate light: If you’re using natural sunlight, make sure to place your plants in a sunny window or use a grow light to provide enough light for proper growth.
- Thin out your seedlings: Once your seeds start to germinate, thin out the weaker seedlings to allow the stronger ones to grow and thrive.
- Transplant your seed starts: Once your seedlings have matured and weather permits, it’s time to transplant them into your outdoor garden. Simple Steps to Plant Seed Starts
Tips for Successful Seed Starting
To ensure the best results, here are some additional tips and tricks for successful seed starting:
- Start with fresh seeds: Make sure you’re using fresh seeds as they have a higher germination rate compared to old seeds that may have been sitting in storage for a while.
- Follow planting instructions: Different seeds may have different planting depths and requirements. Make sure to read the instructions on the seed packet carefully.
- Check for frost dates: Make sure to check the last frost date in your area and plan your seed starting accordingly. Some plants may need to be started indoors much earlier than others to be ready for transplantation.
- Keep track of your seeding schedule: Keep a gardening journal or calendar to keep track of when you started your seeds and when they should be ready to transplant.
- Provide proper air circulation: Good air circulation is important for preventing mold and disease. Make sure to space your plants accordingly and provide adequate airflow.
- Check for pests and diseases: Monitor your plants regularly for any signs of pests or diseases and take necessary measures to prevent them from spreading.

Can I use regular soil for seed starting?
Regular soil is not recommended for seed starting as it is too heavy and can hinder seed germination. Seed starting mix is a much better option as it is light and airy, providing optimal conditions for your seeds to grow.
Do I need to fertilize my seed starts?
No, seed starting mix contains enough nutrients to support your young plants for the first few weeks. Once you transplant them, you can start fertilizing as needed.
How often should I water my seed starts?
Seed starts need to be kept moist, but not overwatered. Check the soil regularly and water when the top inch starts to feel dry.
What if my seeds don’t germinate?
If your seeds don’t germinate within the recommended timeframe, Simple Steps to Plant Seed Starts it’s possible that they may have been planted too deep, the soil is too cold, or the seeds are too old. Try planting new seeds and making sure to follow all the planting instructions for best results.
Conclusion
Planting seed starts is a fun and rewarding experience, and with the right knowledge and techniques, you can have a successful gardening season. Remember to plan out your garden space, gather all necessary materials, follow proper planting techniques, and provide proper care for your plants. With these tips and tricks, Simple Steps to Plant Seed Starts you’ll have a beautiful and thriving garden in no time. Simple Steps to Plant Seed Starts Happy gardening!
Ready to start your own garden? Learn how to properly plant seed starts with these easy tips! Say goodbye to complicated gardening jargon, and hello to a beautiful and thriving garden. Follow our simple guidelines to get your seed starts in the ground and watch them grow into lush plants. Your green thumb awaits!. Plant Simple Steps to Plant Seed Starts: A Beginner’s Guide
How do I plant seed starts?
Start by filling a seed tray with potting soil and moisten the soil. Place the seeds on top of the soil and cover them lightly with more soil. Make sure to label each tray with the type of seeds and the date they were planted. Place the trays in a warm and bright location, and keep the soil moist. Once the seeds have sprouted, thin them out to one plant per cell. When the seedlings have grown enough, transplant them into individual containers or your garden. Simple Steps to Plant Seed Starts
What is the best time to plant seed starts?
The best time to plant seed starts depends on the type of plant you are growing. Cool-season crops like lettuce and broccoli can be planted 4-6 weeks before the last frost date, while warm-season crops like tomatoes and peppers should be started 6-8 weeks before the last frost date. It’s important to check the recommended planting time for each specific plant to ensure optimal growth. Simple Steps to Plant Seed Starts
Do I need to use special soil for seed starts?
Yes, it is recommended to use potting soil specifically designed for starting seeds. These soils are lightweight, sterile, and have a good balance of nutrients to promote seedling growth. Regular garden soil may contain pests or diseases that can harm the fragile seedlings.
How often should I water seed starts?
Seedlings should be watered regularly to keep the soil moist, but not soggy. Check the soil daily and water as needed, usually every 1-2 days. Avoid over-watering as it can lead to root rot and other issues. As the seedlings grow, Simple Steps to Plant Seed Starts you can gradually decrease the frequency of watering.
Can I start seeds indoors without a grow light?
Yes, you can start seeds indoors without a grow light, Simple Steps to Plant Seed Starts but it may result in leggy and weak seedlings. If you don’t have a grow light, make sure to place the seed trays near a sunny window or use reflective surfaces, such as aluminum foil, to help reflect light onto the seedlings. Keep in mind that natural light may not be enough for plants that require a lot of light, so investing in a grow light may be beneficial in the long run.


