
Create a Beautiful Rockery in 5 Easy Steps: A Guide for Beginners. Learn how to make a stunning rockery for your garden in just a few simple steps.
Create a Beautiful Rockery in 5 Easy Steps
Create a beautiful landscape by following these easy guidelines and turn your backyard into a peaceful oasis. No fancy tools or expert skills required, anyone can do it!
Create a Beautiful Rockery in 5 Easy Steps: A Guide for Beginners

Create a Beautiful Rockery in 5 Easy Steps: A Guide for Beginners. by following these Create a Beautiful Rockery in 5 Easy Steps: A Guide for Beginners
The Art of Creating a Rockery: A Step-by-Step Guide
Rockeries, also known as rock gardens, are a popular landscaping feature that adds a touch of natural beauty to any outdoor space. They are a perfect way to incorporate natural elements into your garden without compromising on space. Creating a rockery may seem like a daunting task, but with the right materials and guidance, you can easily create your own rockery that will be the envy of your neighbors. Here’s a comprehensive guide on how to make a rockery that is visually stunning and sustainable.
Materials You Will Need
To create a rockery, you will need the following materials:
- Rocks – This is the key element of any rockery. You can either purchase rocks from a garden supply store or use those found in your backyard. Make sure to select a variety of sizes and shapes to add visual interest to your rockery.
- Soil – Opt for a well-draining soil mix that is rich in nutrients. Avoid using clayey or sandy soil as it may not provide the necessary support for your plants.
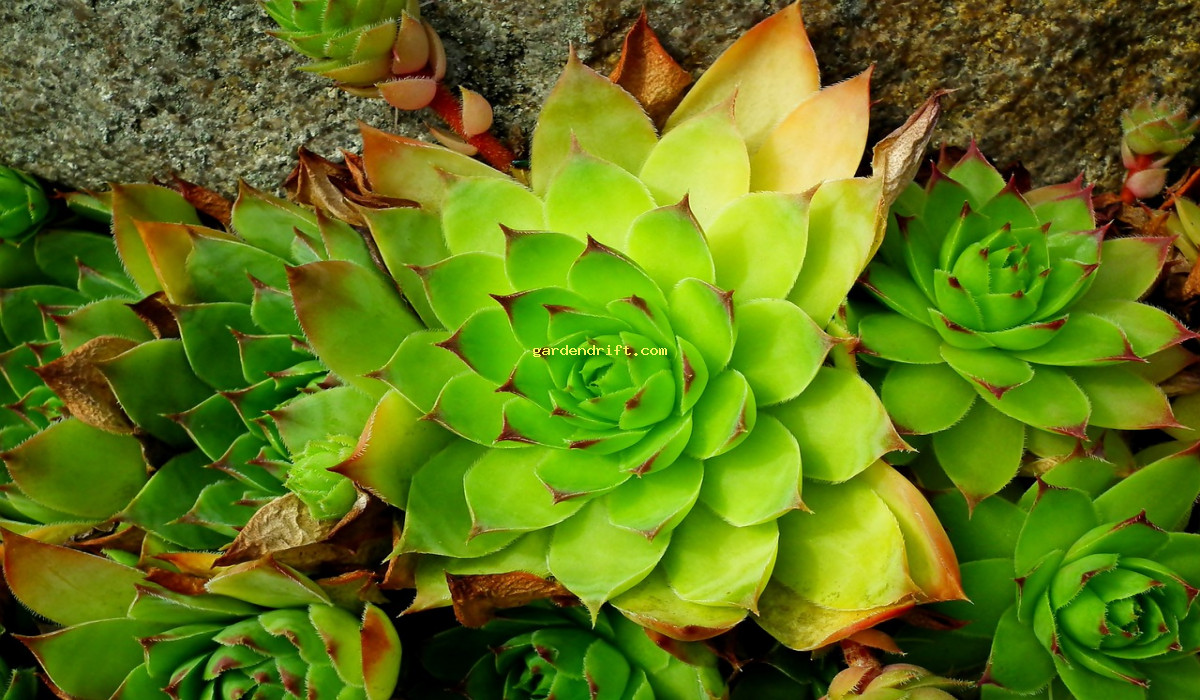
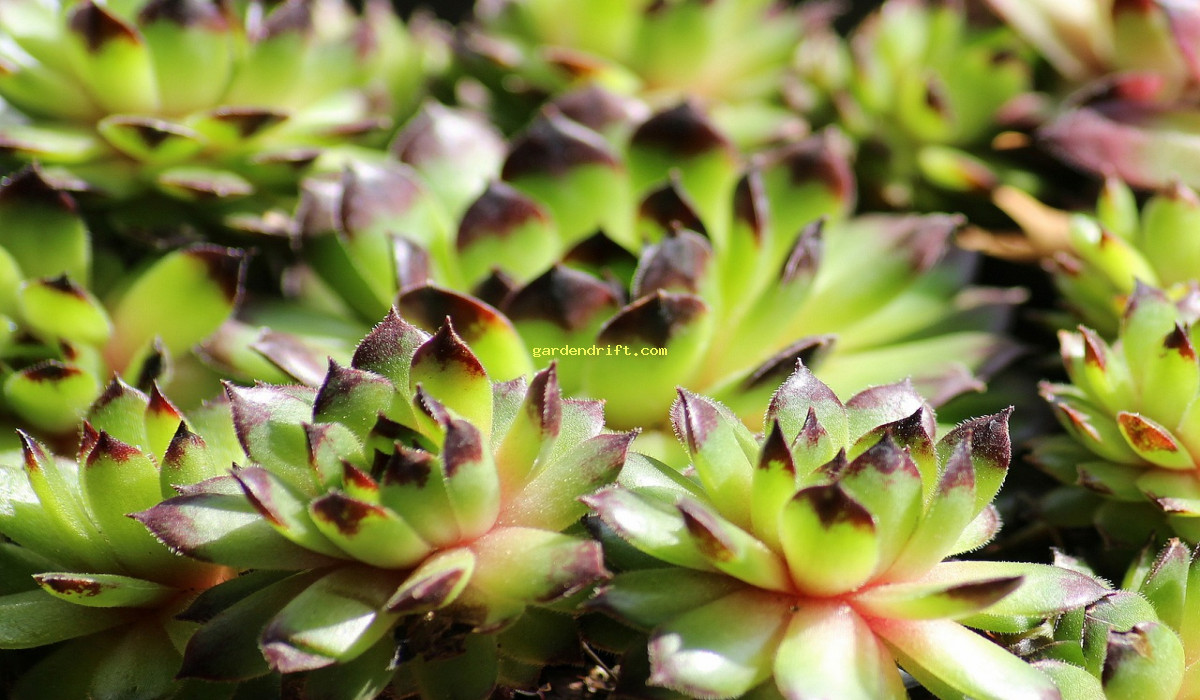
- Plants – Choose plants that are low maintenance and can thrive in rocky conditions. Succulents, alpines, and ornamental grasses are some great options for a rockery.
- Garden Tools – You will need a shovel, rake, gloves, and a wheelbarrow for soil and rock transportation.
Step 1: Choose the Location
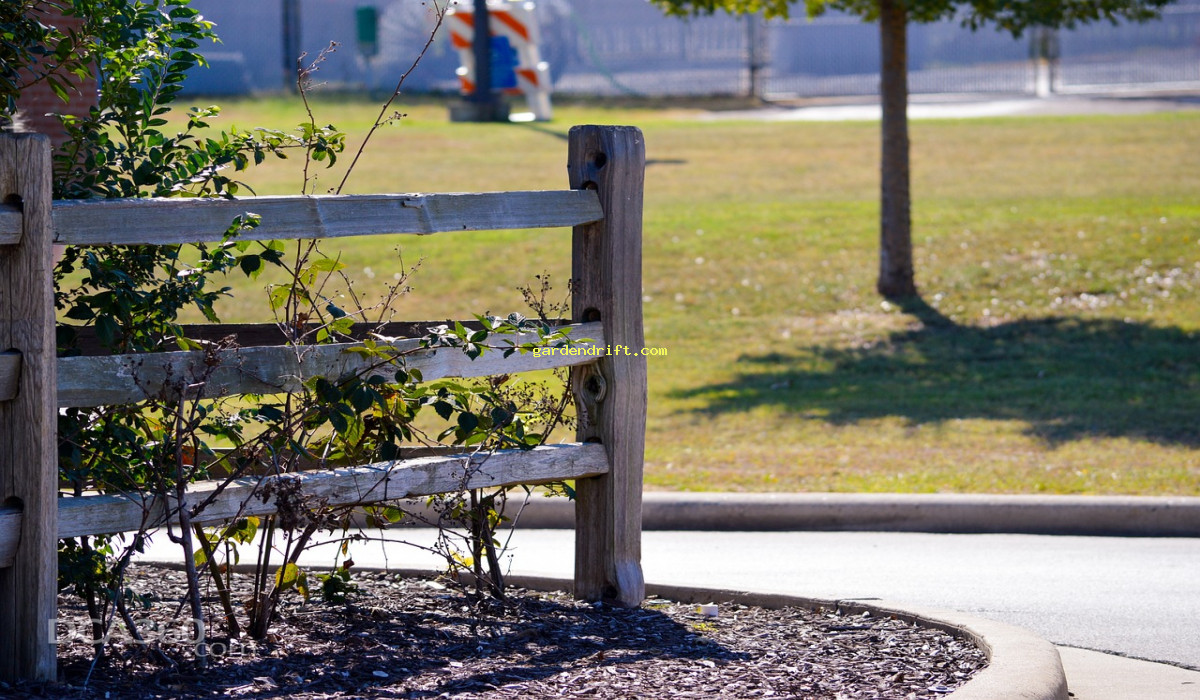
The first step in creating a rockery is to choose the perfect location for it. A sunny spot with well-draining soil is ideal for a rockery. Avoid areas with heavy foot traffic or where excess water accumulates. The size and shape of your chosen location will also determine the design and layout of your rockery.
Step 2: Prepare the Site
Once you have selected the location, it is time to prepare the site for your rockery. Start by removing any existing vegetation, such as grass or weeds, and smoothing out the area with a rake. This will provide a clean canvas to work with.
Step 3: Arrange the Rocks
Now comes the fun part – arranging the rocks. Begin by placing the largest rocks first at the base of the rockery. Make sure to place them in a way that they appear to be naturally jutting out of the ground. Use smaller rocks to fill in the gaps and create natural-looking crevices and slopes. Remember to leave enough space between the rocks for planting.
Step 4: Add the Soil
After the rocks are arranged, it’s time to add the soil. Fill the gaps between the rocks with the well-draining soil mix. Use your shovel to move the soil around and make sure it is evenly distributed. Be careful not to cover the rocks completely, as they are the main attraction of a rockery.
Step 5: Plant Selection and Placement
Next, it’s time to select and place the plants. As mentioned earlier, choose low maintenance plants that can thrive in rocky conditions. Start by placing them at the base of the rocks and work your way up. Mix and match different plants for added visual interest. Plant them in groups or in clusters, and remember to leave enough space for the plants to grow.
Step 6: Mulch and Water
After the planting is done, spread a layer of mulch over the soil. This will help retain moisture in the soil and prevent weed growth. Water the plants thoroughly to help them establish themselves in their new home.
Step 7: Maintenance
Congratulations, you have successfully created your own rockery! But the work doesn’t stop here. Just like any other garden, a rockery requires regular maintenance to stay in shape. Here are some tips for maintaining your rockery:
- Water – Water your rockery as needed. Remember, some plants may require more water than others.
- Pruning – Trim back any dead or overgrown foliage to maintain the original shape and design of your rockery.
- Weeding – Keep an eye out for any unwanted plants or weeds that may pop up in your rockery. Pull them out as soon as possible to prevent them from taking over.
- Fertilizing – Apply a slow-release fertilizer once a year to provide necessary nutrients to your plants.
Tips for a Breathtaking Rockery
Now that you know the basic steps to create a rockery, here are some extra tips to take your rockery from ordinary to extraordinary:
- Make use of different textures – Mix rough and smooth rocks to create a dynamic contrast in your rockery.
- Vary the height of the rocks – Use taller rocks as a focal point and smaller rocks to create cascading slopes.
- Incorporate different shades – Use a mix of lighter and darker rocks to add depth and dimension to your rockery.
- Make use of other natural elements – Add small pebbles or driftwood to enhance the natural look of your rockery.
Ready to Create Your Own Rockery?
Now that you have all the necessary information, it’s time to roll up your sleeves and start creating your own rockery. Remember to have fun and be creative with your design. With a little bit of patience and effort, you can create a beautiful rockery that will be the centerpiece of your garden. So, gather your materials and start building your own rockery today!
Create a Beautiful Rockery in 5 Easy Steps: A Guide for Beginners
Learn how to make a stunning rockery for your garden in just a few simple steps. Create a beautiful landscape by following these easy guidelines and turn your backyard into a peaceful oasis. No fancy tools or expert skills required, anyone can do it! Rockery Create a Beautiful Rockery in 5 Easy Steps: A Guide for Beginners
How To Start A Rock Garden – UrbanMali.com
Create a Beautiful Rockery in 5 Easy Steps: A Guide for Beginners How To Start A Rock Garden – UrbanMali.com Video Create a Beautiful Rockery in 5 Easy Steps: A Guide for Beginners

What is a Rockery and Why Should You Make One?
A rockery, also known as a rock garden, is a unique and aesthetically pleasing addition to any outdoor space. It involves arranging small to medium-sized rocks, stones, and boulders to mimic a natural rock landscape. With the right materials and a little bit of creativity, you can transform a plain patch of land into a beautiful and low-maintenance feature in your garden. In this blog post, we’ll guide you through the process of how to make a rockery, step by step.
Materials You’ll Need to Make a Rockery
Before we dive into the nitty-gritty of building a rockery, let’s go over the materials you’ll need to gather.
– Rocks of various sizes and shapes
– Gravel or sand
– Soil or compost
– Plants or flowers suited for rock gardens
– Garden tools (shovel, rake, trowel)
– Optional: landscape fabric or cardboard for weed control
Step by Step Guide to Making a Rockery
Now that you have all the necessary materials, it’s time to get your hands dirty and start building your rockery. Follow these simple steps for a successful rockery:
Step 1: Choose the Location
The first and most crucial step is to select the perfect spot for your rockery. Look for an area with well-drained soil and good exposure to sunlight. Avoid building your rockery in low-lying areas, as waterlogging can damage your rocks and plants.
Step 2: Prepare the Ground
Once you have chosen the location, it’s time to prepare the ground. Clear the area of any plants, debris, or rocks. If the soil is compacted, use a shovel or rake to loosen it. You can also add a layer of gravel or sand as a base for better drainage.
Step 3: Arrange the Rocks
Now comes the fun part – arranging the rocks. Use a variety of sizes and shapes to create an organic and natural-looking design. Place the larger rocks at the bottom for stability and gradually build up to smaller ones at the top. You can also stack or lean rocks against each other for more dimension.
Step 4: Fill in the Gaps
Using a mix of soil and compost, fill in the gaps between the rocks. Use a trowel to carefully pack the soil around the rocks. This step will also help secure the rocks in place, preventing them from shifting.
Step 5: Plant Your Rockery
Once the rocks and soil are in place, it’s time to add some greenery to your rockery. Choose plants that are well-suited for rock gardens, such as succulents, alpines, and dwarf conifers. Make sure to leave enough space for the plants to spread and grow.
Step 6: Add Finishing Touches
To add a naturalistic touch to your rockery, scatter some loose gravel or small rocks around the plants. You can also add a layer of mulch or bark chips to help with water retention and weed control.
Step 7: Maintain Your Rockery
Maintaining your rockery is relatively easy. Water the plants regularly, but be mindful not to overwater and rot the roots. Remove any weeds or debris that may appear and replace plants if they outgrow their space. You can also add new rocks or plants to refresh the look of your rockery.
Benefits of Making a Rockery
Apart from enhancing the visual appeal of your garden, building a rockery has many other benefits. Here are some reasons why you should consider making a rockery:
– Low maintenance: Rockeries require little upkeep compared to traditional flower gardens. They are great for busy gardeners or those with a limited amount of time and energy.
– Perfect for small spaces: If you have a small yard or limited gardening space, a rockery is an ideal solution. You can create a beautiful landscape in a compact area.
– Drought-resistant: Rock gardens are drought-resistant as they require less water compared to traditional gardens.
– Attracts wildlife: A rockery can be a haven for various wildlife, such as lizards, butterflies, and insects. It can also attract birds looking for a place to drink and bathe.
– Adds texture: The use of different types of rocks and plants in a rockery adds texture and interest to your garden. It can also complement other elements in your landscape, such as a pond or fountain.
Final Thoughts
Making a rockery is a fun and rewarding DIY project that can add depth and character to your garden. With the right materials and a bit of creativity, you can create a stunning landscape that will last for years to come. Remember to choose a suitable location, prepare the ground, and carefully arrange the rocks for a successful rockery. Happy gardening! Create a Beautiful Rockery in 5 Easy Steps: A Guide for Beginners
.
How do I choose the right location for my rockery?
A successful rockery begins with choosing the right location. Look for an area that receives plenty of sunlight but is also shaded during the hottest part of the day. Avoid areas that are prone to flooding or in constant shade.
What type of rocks should I use for my rockery?
The type of rocks you choose can greatly influence the appearance and success of your rockery. Select rocks that have interesting shapes and textures, such as limestone, sandstone, or granite. Avoid using large, uniform rocks that can look unnatural and out of place.
How do I prepare the soil for my rockery?
It’s important to prepare the soil before creating your rockery. Remove any existing vegetation or weeds and loosen the soil with a garden fork. Mix in some organic matter, such as compost or aged manure, to improve drainage and add nutrients.
Can I use plants in my rockery?
Absolutely! In fact, incorporating plants into your rockery can add color and texture to your design. Choose plants that are suited to your local climate and will thrive in the conditions of your rockery, such as succulents, alpines, and dwarf conifers.
Should I build a retaining wall for my rockery?
Depending on the size and slope of your chosen site, a retaining wall may be necessary to hold the soil and rocks in place. Consider using natural stone or timber for a more organic look.
How do I create a natural look for my rockery?
To achieve a natural look, be strategic with your placement of rocks and plants. Avoid perfectly symmetrical designs and try to mimic how rocks would naturally occur in nature, with larger rocks at the base and smaller rocks towards the top.
Can I add a water feature to my rockery?
Yes, adding a small water feature, such as a fountain or pond, can add a calming and tranquil element to your rockery. Just make sure to choose plants and rocks that are suitable for a wet environment.
How do I maintain my rockery?
Regular maintenance is key to keeping your rockery looking its best. Remove any weeds that may pop up and trim back plants as needed. Also, be sure to inspect and repair any damage to the rockery after heavy rain or storms.
Can I DIY a rockery or should I hire a professional?
The decision to DIY or hire a professional for your rockery ultimately depends on your skill level and the size and complexity of your desired rockery. If you have experience with landscaping and feel confident, you can likely tackle a small rockery on your own. Otherwise, hiring a professional may be the best option.
How long does it take for a rockery to fully develop?
The time it takes for a rockery to reach its full potential depends on several factors, such as the types of plants used, the amount of maintenance, and the climate. In general, it can take 2-3 years for a rockery to fully develop and reach its desired look.
Create a Beautiful Rockery in 5 Easy Steps: A Guide for Beginners


