
Create Your Own Sprinkler System in 5 Easy Steps Using a Garden Hose. Learn how to easily make a sprinkler system using just a garden hose.
Create Your Own Sprinkler System in 5 Easy Steps
Our step-by-step guide will help you create a DIY sprinkler system that will keep your lawn and garden hydrated all summer long. Plus, it’s budget-friendly and simple enough for anyone to do. Follow these simple instructions and enjoy a beautiful, green yard without breaking the bank.
Create Your Own Sprinkler System in 5 Easy Steps Using a Garden Hose
Create Your Own Sprinkler System in 5 Easy Steps Using a Garden Hose. lawn and garden Create Your Own Sprinkler System in 5 Easy Steps Using a Garden Hose
A Sprinkler System with Garden Hose: An Easy DIY Guide
Sprinkler systems are vital for maintaining a lush and healthy garden, but they can also be quite expensive. Luckily Create Your Own Sprinkler System in 5 Easy Steps, you can make your own sprinkler system with just a few materials and a garden hose. Not only will this save you money, but it also gives you the flexibility to customize your sprinkler system according to your garden’s needs. In this article, we’ll walk you through the step-by-step process of making a sprinkler system with a garden hose, so let’s get started!
Materials Needed
Before we jump into the steps, let’s gather all the materials you’ll need for this DIY project. Here’s a list of everything you’ll need to make a sprinkler system with a garden hose:
• Garden hose
• Scissors
• Hose connectors and couplings
• Hose timer
• Sprinkler heads
• Wooden stakes
• Hammer
• Drill with a small drill bit
• Hose Y-connector
• Duct tape
• Ruler
• Pencil
Step 1: Plan Your Sprinkler System
The first step in making a sprinkler system with a garden hose is to plan where you want your sprinkler heads to be placed. Take a walk around your garden and identify the areas that need watering. These are usually the areas with plants or grass that tend to dry out quickly. Once you’ve identified these areas, you can determine the number of sprinkler heads you’ll need and how far apart they should be placed.
Step 2: Cut the Garden Hose
Using your ruler and pencil, mark the spots on the garden hose where you want your sprinkler heads to be placed. Then, using scissors, carefully cut the hose at these marks. Remember to leave a little extra length on the ends in case you need to adjust the sprinkler heads later. You can always trim the hose later if needed.
Step 3: Install Hose Connectors and Couplings
Next, you’ll need to install hose connectors and couplings to attach the different pieces of your sprinkler system Create Your Own Sprinkler System in 5 Easy Steps. These connectors and couplings are essential for proper water flow. Follow the instructions on the packaging to attach them correctly to your garden hose.
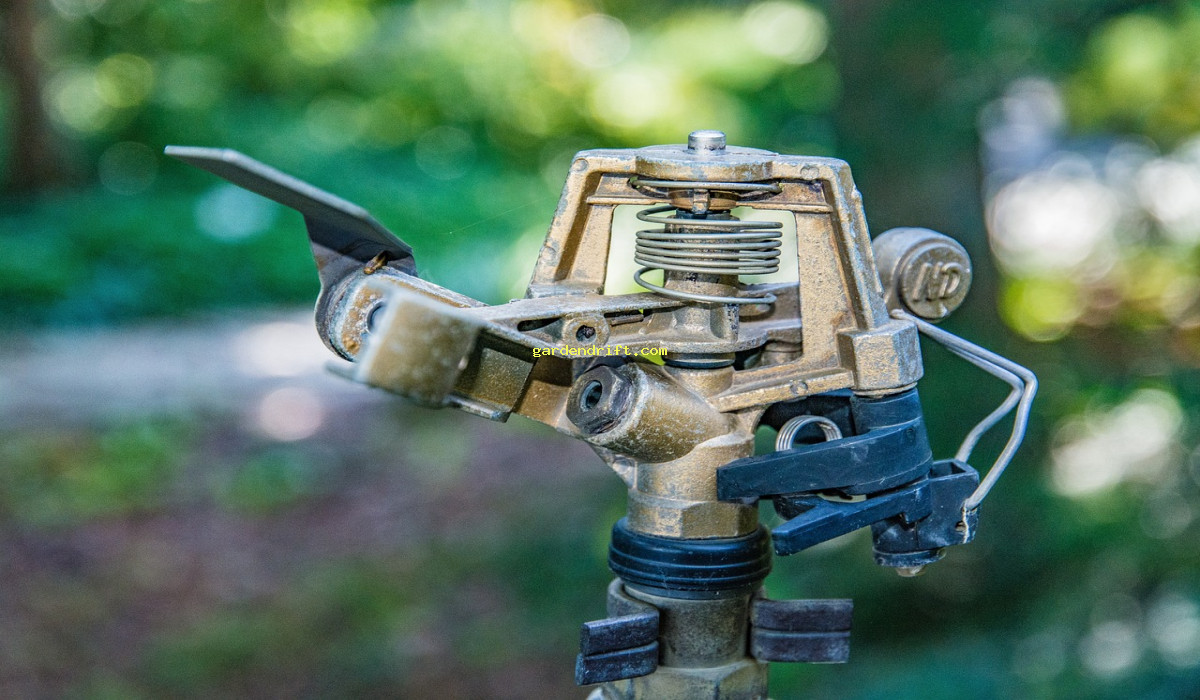
Step 4: Attach Sprinkler Heads
Once the connectors and couplings are in place, it’s time to attach the sprinkler heads. You can find a variety of sprinkler heads at your local hardware store, so choose the type that best suits your needs. Simply screw the sprinkler heads onto the hose connectors, making sure they are securely attached.
Step 5: Install a Hose Timer
A hose timer is a useful addition to your sprinkler system as it allows you to control when your garden will be watered. You can set it to water at specific times, ensuring your plants receive the right amount of water without overwatering, which can lead to water wastage and damaged plants. Follow the instructions on the timer’s packaging to install it correctly.
Step 6: Set Up the Sprinkler Heads
With the sprinkler heads attached to the hose and the timer installed, it’s time to set them up in your garden. Use wooden stakes and a hammer to secure the sprinkler heads to the ground. This will prevent them from moving around while watering. You can also use duct tape to secure the hose in place, ensuring it stays in the desired position.
Step 7: Create Multiple Zones
If you have a big garden, you may need more than one sprinkler system to cover the entire area. In this case, you can use a hose Y-connector to create multiple zones. This will allow you to water different areas of your garden at different times, ensuring all your plants receive adequate water. Simply attach the Y-connector to the timer and connect the hoses to each end of the Y-shaped connector.
Step 8: Test Your System
After setting up your sprinkler system, it’s essential to test it to make sure everything is working correctly. Turn on your water supply and set the timer to water for a few minutes. Check each sprinkler head to ensure it’s spraying water in the desired direction and covering the intended area. Also, make sure there are no leaks in your system. If everything looks good, then your sprinkler system is ready to use!
Step 9: Adjust and Maintain Your System
One of the advantages of making your own sprinkler system is the flexibility to adjust it according to your garden’s needs. If you notice any dry spots in your garden, you can easily move or add sprinkler heads as needed. Also, make sure to regularly check and maintain your system, especially before the summer season. Replace any damaged parts and make any necessary adjustments to ensure your system is working efficiently.
Step 10: Enjoy Your Lush Garden
Congratulations! You have successfully made your own sprinkler system with a garden hose Create Your Own Sprinkler System in 5 Easy Steps. Now all that’s left to do is sit back and watch your garden flourish with the perfect amount of water provided by your new sprinkler system.
In Summary
Making a sprinkler system with a garden hose is a cost-effective and straightforward solution for keeping your garden hydrated. By following these steps, you can customize your system to fit your garden’s needs and save money on water bills. Remember to regularly maintain your system to ensure it continues to work efficiently for a thriving garden all year round. Happy gardening!
Create Your Own Sprinkler System in 5 Easy Steps Using a Garden Hose
Learn how to easily make a sprinkler system using just a garden hose. Our step-by-step guide will help you create a DIY sprinkler system that will keep your lawn and garden hydrated all summer long. Plus, it’s budget-friendly and simple enough for anyone to do. Follow these simple instructions and enjoy a beautiful, green yard without breaking the bank.. sprinkler system Create Your Own Sprinkler System in 5 Easy Steps Using a Garden Hose
DIY Garden Hose Sprinkler system
Create Your Own Sprinkler System in 5 Easy Steps Using a Garden Hose DIY Garden Hose Sprinkler system Video Create Your Own Sprinkler System in 5 Easy Steps Using a Garden Hose
Sprinkler Systems Made Easy: How to Create Your Own with a Garden Hose
Sprinkler systems are an essential element in maintaining a healthy and vibrant garden or lawn. However, installing a professional sprinkler system can be costly and involve complex installation processes. Fortunately, you can make your own sprinkler system with just a simple garden hose and some basic tools. In this blog post, we’ll guide you through the process of creating a DIY sprinkler system with a garden hose, saving you time and money while achieving excellent results. Read on to learn how to make a sprinkler system with a garden hose in just a few easy steps!
Covering the Basics: How Do Sprinkler Systems Work?
Before we dive into the nitty-gritty of making a sprinkler system with a garden hose Create Your Own Sprinkler System in 5 Easy Steps, it’s essential to understand the basics of how sprinkler systems work. A sprinkler system is composed of a network of pipes, valves, and sprinkler heads that work together to distribute water evenly over a designated area. A pump or water source supplies pressurized water to the pipes, which is then released through the sprinkler heads, creating a mist or spray that waters the surrounding area.
Gathering the Necessary Supplies
To make a sprinkler system with a garden hose, you will need the following supplies:
1. A garden hose
2. Garden hose repair fittings
3. Teflon tape
4. A hose splitter
5. Hose clamps
6. A pressure gauge
7. A drill
8. A brass cap
9. PVC pipe
10. A PVC pipe cutter
11. PVC elbow joints
12. T-connectors
13. PVC primer and cement
14. A garden sprinkler
15. A timer (optional)
Step-by-Step Guide: How to Make a Sprinkler System with a Garden Hose
Follow these simple steps to create your own sprinkler system with a garden hose:
1. Plan Your System: The first step is to plan out where you want your sprinkler system to cover. Consider the size and shape of your lawn or garden and where the plants or grass need the most water. You can also draw a rough sketch of your lawn or garden and mark the areas where you want the sprinkler heads to be located.
2. Cut the PVC Pipe: Use a PVC pipe cutter to cut the PVC pipe into the desired lengths for your sprinkler system. Ensure that the PVC pipes are cut straight and have clean edges.

3. Assemble the PVC Pipe: Using the T-connectors and elbow joints, connect the PVC pipes to form the framework for your sprinkler system. Use PVC primer and cement to secure the joints in place. The T-connectors should be placed at the locations marked on your plan to serve as the base for your sprinkler heads.
4. Attach the Garden Hose: Using the drill, create a hole in the PVC pipe and carefully attach the garden hose to it using a hose clamp. This step may require additional assistance to ensure a secure connection.
5. Install the Sprinkler Heads: Attach the garden sprinkler to the T-connectors using a sprinkler head riser. Make sure to use Teflon tape on the threads to prevent leaks. You can also adjust the height of the risers to customize the spray height of your sprinkler heads.
6. Test the Sprinkler System: Turn on the water supply and check for any leaks or faulty connections. If everything looks good, test the sprinkler heads to see if they are distributing water evenly and at the desired height. Adjust the sprinkler heads or risers as needed.
7. Add a Timer (Optional): If you want to automate your sprinkler system, you can add a timer to control when the system turns on and off. This step is optional but can be beneficial if you have a busy schedule and want to ensure your lawn or garden is watered regularly.
Can I use any type of garden hose to make a sprinkler system?
It’s recommended to use a heavy-duty garden hose with a larger diameter to maintain adequate water pressure for the system.
Do I need to bury the PVC pipes for my sprinkler system?
It’s not necessary to bury the PVC pipes, but doing so can protect them from potential damage and create a more seamless look for your lawn or garden.
Can I use a regular sprinkler nozzle instead of a garden sprinkler?
It’s best to use a garden sprinkler designed for a sprinkler system as it will provide the appropriate water distribution and pressure for the system.
Conclusion
Creating your own sprinkler system with a garden hose is a great way to save money, customize your watering schedule, and have fun with a DIY project. By following the steps outlined in this post, you can make a sprinkler system that meets your specific garden or lawn needs and keeps your plants and grass healthy and hydrated. So, grab your garden hose and get ready to make your own sprinkler system today! Create Your Own Sprinkler System in 5 Easy Steps Using a Garden Hose
 Create Your Own Sprinkler System in 5 Easy Steps Using a Garden Hose
and Faq answer Must be
What do I need to make a DIY sprinkler system from garden hose?
To make a DIY sprinkler system using a garden hose, you will need a garden hose, a sprinkler head, a sharp knife, and a drill with a small drill bit. You may also need stakes or rocks to hold down the sprinkler head and extension pieces if you want to cover a larger area.
How do I attach a sprinkler head to a garden hose?
To attach a sprinkler head to a garden hose, you will need to cut the end of the garden hose with a sharp knife to create an opening. Then, insert the sprinkler head into the opening and secure it with a clamp or zip tie. Finally, test the connection to make sure there are no leaks.
Can I make a sprinkler system with any type of garden hose?
Yes, you can make a sprinkler system with any type of garden hose, including rubber, vinyl, or expandable hoses. However, it is recommended to use a durable and flexible garden hose to ensure the sprinkler system works effectively.
How do I control the water pressure for my DIY sprinkler system?
You can control the water pressure for your DIY sprinkler system by adjusting the flow rate of your garden hose. You can do this by either adjusting the faucet or using a flow control valve at the beginning of the sprinkler system.
Can I make a sprinkler system with a garden hose and PVC pipes?
Yes, you can make a sprinkler system with a garden hose and PVC pipes. You will need to connect the garden hose to a PVC pipe using a sprinkler head adapter and then attach PVC pipes with various sprinkler heads to cover a larger area.
How long should the garden hose be for my sprinkler system?
The length of your garden hose for your sprinkler system will depend on the area you want to cover. As a general rule, it is recommended to use a garden hose that is at least 50 feet long to cover a medium-sized yard. You can always purchase a longer hose if needed and cut it to your desired length.
How often should I water my lawn with a DIY sprinkler system?
It is recommended to water your lawn with a DIY sprinkler system two to three times a week. However, the frequency may vary depending on your climate, soil type, and grass type. It is essential to monitor how your lawn responds to the watering to determine the ideal schedule for your sprinkler system.
Can I use a DIY sprinkler system for other purposes besides watering my lawn?
Yes, you can use a DIY sprinkler system for other purposes besides watering your lawn. You can use it to water your garden, create a cool-down area for kids to play in during hot summer days, or for cleaning outdoor furniture or equipment. Just make sure to adjust the sprinkler heads accordingly for each purpose.
How do I winterize my DIY sprinkler system with a garden hose?
To winterize your DIY sprinkler system with a garden hose, you will need to drain all the water out of the system first by turning off the water source and running the sprinkler heads until there is no water left. Then, disconnect the hoses and store them in a dry, warm area to prevent any damage from freezing temperatures.
Are there any maintenance tips for my DIY sprinkler system with a garden hose?
Yes, there are a few maintenance tips for your DIY sprinkler system with a garden hose. Regularly check for any leaks or clogs in the system, adjust the sprinkler heads as needed, and make sure to store the system properly during winter months. It is also recommended to replace the garden hose every few years to ensure optimal performance.
Create Your Own Sprinkler System in 5 Easy Steps Using a Garden Hose