
Create Your Own Rain Garden in 4 Simple Steps: A Step-by-Step Guide. Looking to create a beautiful and eco-friendly garden that also helps prevent flooding?
Create Your Own Rain Garden in 4 Simple Steps
Learn how to make a rain garden in just a few simple steps! Our guide covers everything you need to know about selecting the right location, choosing the right plants, and creating a rain garden that will thrive in any weather. No need for complicated techniques or expensive equipment – all you need is a little bit of time, effort, and our helpful tips to create your very own rain garden oasis. Let’s get started!
Create Your Own Rain Garden in 4 Simple Steps: A Step-by-Step Guide

Create Your Own Rain Garden in 4 Simple Steps: A Step-by-Step Guide. plants and creating Create Your Own Rain Garden in 4 Simple Steps: A Step-by-Step Guide
The Basics of Making a Rain Garden: A Step-by-Step Guide
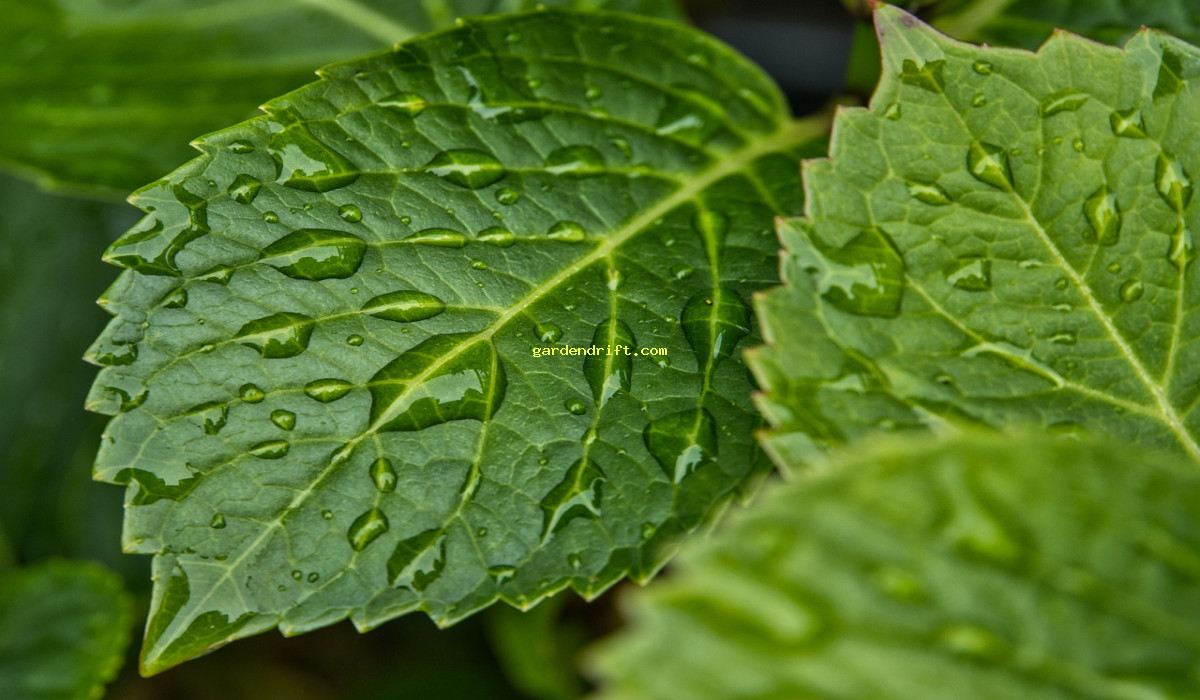
At its core, a rain garden is a beautiful and eco-friendly way to manage stormwater runoff. It is essentially a shallow depression filled with vegetation that captures and filters rainwater, allowing it to slowly seep into the ground rather than flow into storm drains or streams. This not only helps prevent erosion and flooding but also assists in replenishing groundwater reserves.
Rain gardens are easy to make and require minimal maintenance once established. They also attract a variety of beneficial insects and wildlife, making them a welcome addition to any backyard. In this article, we will dive into the steps involved in creating a rain garden, so you can transform your yard into a sustainable oasis.
Choose the Right Location
The first step in making a rain garden is selecting the ideal location for it. Look for an area in your yard where water naturally collects or flows after a storm. This could be a low-lying spot, or near a downspout where rainwater from your roof drains. It is important to avoid areas where water will pool for more than 24 hours, as this can lead to mosquito breeding.
Determine the Size and Shape
The size and shape of your rain garden will depend on the amount of runoff it needs to handle. As a general rule, it should be about 30% of the size of the impervious surface (such as your roof or driveway) that is draining into it. So, for every square foot of impervious surface, you need 30 square feet of rain garden. As for the shape, make it slightly concave so that it can collect and hold water.
Check for Underground Utilities
Before digging, it is crucial to check for any underground utilities in the chosen location. This will prevent any accidents and ensure the safety of both you and your garden. You can call your local utility company to have them flag any utility lines in the area.
Prepare the Site
Once you have the right location and size for your rain garden, it is time to start preparing the site. Remove any grass, weeds, or debris from the area. It is also helpful to loosen up the soil with a shovel or garden fork to aid in water absorption.
Create an Infiltration Trench
An infiltration trench is a key element of a successful rain garden. It is a trench dug around the outer edge of the garden to help direct water into the garden and prevent runoff. Dig a trench that is approximately 6-12 inches deep and 6-12 inches wide, angling it slightly towards the rain garden.
Add a Layer of Gravel
To further aid in drainage, add a layer of gravel on top of the trench. This will serve as a barrier between the soil and the water, allowing it to percolate through but not get clogged up with dirt.
Select the Right Plants
When it comes to selecting plants for your rain garden, choose those that are native to your area and can thrive in both wet and dry conditions. These plants not only require less maintenance but are also more drought and pest-resistant. Look for species like black-eyed Susans, bee balm, and sedges.
Plant the Garden
Now it is time to start planting! Start with taller plants towards the back of the rain garden, then gradually work your way forward towards shorter plants. This will create a natural, layered effect. Make sure to leave enough space between plants for them to grow and spread out.
Add Mulch
Mulch is essential in a rain garden as it helps retain moisture, suppresses weeds, and provides vital nutrients to the soil. Use a layer of 2-3 inches of mulch, making sure to keep it at least 2-3 inches away from the base of plants to prevent rot.
Water and Maintain
Initially, you will need to water your rain garden to help the plants establish their roots. After that, it should thrive on the natural rainfall.

It is crucial to maintain the rain garden by keeping it free from debris and regularly removing weeds. You can also add a layer of fresh mulch every year to help retain moisture and improve soil quality.
Monitor the Garden
It is important to monitor your rain garden after heavy rainfall to ensure it is functioning properly and water is draining and infiltrating into the ground. If you notice any pooling of water, you may need to adjust the infiltration trench or add more plants to help absorb the excess water.
Consider Overflow Options
In case of a severe storm, your rain garden may not be able to handle all the water runoff. To prevent the garden from flooding, it is a good idea to have an overflow option such as a swale or dry creek bed to redirect the excess water.
Maintain a Slope
To help with water infiltration and prevent erosion, maintain a gentle slope towards the rain garden. This will ensure that water flows into the garden naturally and does not create any standing puddles.
Reuse Rainwater
Another great way to make the most out of your rain garden is by reusing rainwater to water your other plants. You can install a rain barrel and collect water from your roof’s downspout to use in your garden or for other household purposes.
Enjoy Your Rain Garden
Finally, sit back, relax, and enjoy your beautiful and functional rain garden. Not only does it add visual appeal to your yard, but it is also an eco-friendly solution for managing stormwater runoff. With proper maintenance, your rain garden will continue to flourish and provide numerous benefits for years to come.
Create Your Own Rain Garden in 4 Simple Steps: A Step-by-Step Guide
Looking to create a beautiful and eco-friendly garden that also helps prevent flooding? Learn how to make a rain garden in just a few simple steps! Our guide covers everything you need to know about selecting the right location, choosing the right plants, and creating a rain garden that will thrive in any weather. No need for complicated techniques or expensive equipment – all you need is a little bit of time, effort, and our helpful tips to create your very own rain garden oasis. Let’s get started!. Rain garden Create Your Own Rain Garden in 4 Simple Steps: A Step-by-Step Guide
How To Create a Rain Garden | Ask This Old House
Create Your Own Rain Garden in 4 Simple Steps: A Step-by-Step Guide How To Create a Rain Garden | Ask This Old House Video Create Your Own Rain Garden in 4 Simple Steps: A Step-by-Step Guide
How to Make a Rain Garden: A Comprehensive Guide
Rain gardens are beautiful and functional additions to any landscape. They not only add aesthetic value to your property but also have numerous environmental benefits. From reducing water pollution to providing a natural habitat for wildlife, rain gardens are an effective way to manage stormwater and conserve water resources. In this blog post, we will guide you through the steps of creating your own rain garden.
What is a Rain Garden?
Before we dive into the details of how to make a rain garden, let’s first understand what exactly a rain garden is. Simply put, a rain garden is a shallow, depression-like area that is designed to collect, absorb, and filter stormwater runoff from roofs, driveways, and other impermeable surfaces. It is typically located in low-lying areas of a landscape and is planted with native vegetation.
The Benefits of a Rain Garden
Rain gardens have numerous benefits for both the environment and the property owner. Below are some of the key benefits of having a rain garden:
Create Your Own Rain Garden in 4 Simple Steps
– Helps to reduce water pollution by filtering and absorbing stormwater runoff, preventing harmful pollutants from reaching water bodies.
– Increases the amount of water that seeps into the ground, replenishing groundwater supply.
– Reduces the risk of flooding by managing stormwater on site.
– Provides a natural habitat for birds, butterflies, and other wildlife.
– Adds aesthetic value to your property with beautiful flowers and plants.
– Lowers water bills by reducing the need for irrigation.
– Requires minimal maintenance once established.
How to Make a Rain Garden in 15 Easy Steps
Now that we have covered the basics of rain gardens let’s dive into the steps of creating one. Follow these 15 easy steps to make your own rain garden:
Step 1: Choose the Right Location
The first step to creating a rain garden is choosing the right location. Look for a low-lying area in your landscape that receives a lot of runoff from your roof or driveway. Make sure the area is at least ten feet away from your home’s foundation and any septic systems.
Step 2: Measure the Area
Measure the area you have selected for your rain garden. This will help you determine the amount of soil and plants needed. Remember, the size of your rain garden will depend on the size of your property and the amount of water runoff.
Step 3: Check for Underground Utilities
Before you start digging, make sure to check for any underground utilities like gas lines or electrical wires. Contact your local utility company to mark the location of these utilities to avoid any accidents.
Step 4: Prepare for Digging
Now that you have marked the area and checked for any underground utilities, it’s time to prepare for digging. You will need a shovel, wheelbarrow, and a mattock or pickaxe to break up the soil.
Step 5: Dig the Basin
The next step is to dig the basin for your rain garden. The basin should be at least six to nine inches deep in the center and sloped towards the edges. This will allow the water to collect and soak into the ground.
Step 6: Create an Overflow Swale
To prevent your rain garden from becoming oversaturated, create an overflow swale on the lower side of the basin. This will divert excess water away from your rain garden.
Step 7: Test the Soil
It’s important to test the soil in your rain garden before planting. You can do a simple soil drainage test by digging a small hole in the center and filling it with water. If the water does not drain within 24 hours, your soil may be too compacted. In such cases, mix some compost or sand into the soil to improve drainage.
Step 8: Add a Layer of Mulch
Once you have tested the soil, add a layer of mulch to help retain moisture and suppress weed growth.
Step 9: Choose the Right Plants
When it comes to choosing plants for your rain garden, native plants are your best option. They are well adapted to the local climate and can thrive in the natural conditions of your rain garden. Some great options include black-eyed Susans, butterfly weed, and swamp milkweed.
Step 10: Plant Your Garden
Now it’s time to plant your rain garden. Start by planting taller plants in the center and gradually move towards the edges with smaller plants.
Step 11: Add Rocks or Stones
Adding rocks or stones around the edges of your rain garden can help prevent erosion and provide a natural border.
Step 12: Water and Mulch Again
After planting, water your rain garden thoroughly and add another layer of mulch. This will help retain moisture and suppress weeds while your new plants establish themselves.
Step 13: Maintain Your Rain Garden
Once your rain garden is established, it will require minimal maintenance. However, it’s important to keep an eye on it and remove any invasive plants or weeds that may appear.
Step 14: Expand Your Rain Garden
If you have the space and resources, consider expanding your rain garden. This will increase its stormwater management capacity and add more beautiful plants to your landscape.
Step 15: Enjoy Your Rain Garden
Lastly, sit back, relax, and enjoy your new rain garden! Not only is it aesthetically pleasing, but it also has numerous environmental benefits that you can feel good about.
Things to Keep in Mind
Before you start making your rain garden, here are a few things to keep in mind:
– Always check for utility lines before digging to avoid any accidents.
– Choose native plants for your rain garden to ensure they can thrive in the natural conditions.
– Do not use any pesticides or chemicals in your rain garden as they will harm the environment and the plants.
– Monitor your rain garden regularly to ensure it is functioning properly and make any necessary adjustments.
– Consider incorporating a rain barrel or other rainwater harvesting techniques in your landscape to further conserve water.
Conclusion
Creating a rain garden is an easy and effective way to manage stormwater and add beauty to your landscape. By following these 15 steps and keeping a few things in mind, you can create your own rain garden and make a positive impact on the environment. So, roll up your sleeves and get ready to make your very own rain garden! Create Your Own Rain Garden in 4 Simple Steps: A Step-by-Step Guide
 Create Your Own Rain Garden in 4 Simple Steps: A Step-by-Step Guide
>this page and some part of the FAQ are nice
Why should you make a rain garden?
A rain garden can provide many benefits for both the environment and your property. It helps manage stormwater runoff, prevents soil erosion, and filters pollutants from entering our water sources. Additionally, it can add aesthetic charm to your landscape and serve as a habitat for beneficial insects and birds.
What is the best location for a rain garden?
The best location for a rain garden is a low-lying area in your yard that receives frequent rainfall. This can be near a downspout or any other area where water tends to collect. It’s important to avoid placing the rain garden over underground utilities or near a septic system.
How do you prepare the site for a rain garden?
Preparing the site for a rain garden involves removing any grass, weeds, or other vegetation from the area. You may also need to add a layer of compost or topsoil to help with drainage. It’s essential to check the soil’s drainage before planting to ensure it can absorb water.
What types of plants are suitable for a rain garden?
There are many types of plants that thrive in rain garden conditions. Some favorites include native grasses, wildflowers, and shrubs such as blue flag iris, sedges, and black-eyed susans. These plants have deep root systems that help absorb water and filter pollutants effectively.
How do you maintain a rain garden?
Maintaining a rain garden involves regular weeding, watering, and mulching. During periods of low rainfall, you may need to water your rain garden to keep the plants healthy. It’s also essential to remove any debris such as fallen leaves or excess mulch from the garden regularly.
How do you incorporate a rain garden into your landscaping?
Incorporating a rain garden into your landscape design can be both functional and visually appealing. You can use different shapes, sizes, and levels to create a unique focal point in your yard. You can also add other elements such as boulders or decorative rocks to enhance the garden’s look.
What are some common mistakes to avoid when making a rain garden?
Some common mistakes to avoid when making a rain garden include choosing the wrong location, not considering the soil’s drainage, and using plants that are not suited for the water conditions. It’s also important to avoid using fertilizers or pesticides near your rain garden as they can harm the plants and disrupt the garden’s natural filtration process.
Can you make a rain garden if you live in an urban area?
Yes, you can make a rain garden even if you live in an urban area. One way to do this is by incorporating it into your rooftop garden or creating a mini rain garden in a raised bed. You can also use a rain barrel to collect rainwater and then use it to water your rain garden.
Are there any incentives or rebates for making a rain garden?
Many municipalities offer incentives or rebates for creating a rain garden on your property. These can include reduced stormwater fees or reimbursements for the cost of materials. Be sure to check with your local government office or utility company to see if they have any programs available.
Can you use a rain garden for other purposes?
Yes, you can use a rain garden for other purposes besides managing stormwater runoff. It can serve as a beneficial area for planting vegetables or herbs that require consistent watering. You can also turn it into a mini wildlife habitat by adding a birdbath and bird feeder nearby. Create Your Own Rain Garden in 4 Simple Steps: A Step-by-Step Guide